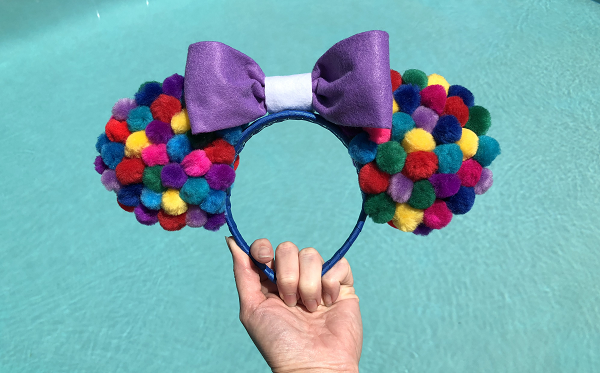
Adventure is out there – DIY Balloon Ears Tutorial
Pixar Pier at Disney’s California Adventure
When we heard about Paradise Pier changing to Pixar Pier. Max, my 13 year old son/crafting partner and I were pretty excited about the news. He inspired this project. At first, he wanted to make a fun headband with pom pom “balloons” (I think he mostly wanted to use the hot glue gun, I can’t say I blame him).
Then, he started building Mickey Ears with craft foam, sewing them together and using tinsel for the filling, which I thought is clever because it gives good volume and the filling is pretty lightweight. Completed, these ears weigh about 4 ounces which isn’t too bad, especially for how cute they are. He has a craft kit that he got for his birthday with supplies from Dollar Tree, so all of the supplies we used for these ears are from a well stocked Dollar Tree! If you can’t find any of these supplies at your Dollar Tree, I will link to similar products on Amazon and Target so you can get crafting ASAP.

Step-by-Step DIY Mouse Ears
I have seen some Mouse Ear DIY videos that don’t cover all the steps and could be a little confusing, so I wanted to make sure this DIY is step-by-step. It is a little lengthy but I would rather you be able to skip ahead, than wonder how to do part of it. I am also pretty new to making DIY videos, so let me know what you think. I promise, they will get better, so please subscribe to my Youtube channel to be notified of new videos when they come out.
**This post contains affiliate links. When you click these links I may make a commission on purchases made through those links. As an Amazon Associate I earn from qualifying purchases.**
List of Supplies for DIY Balloon Mouse Ears:
Hot glue gun
Hot glue sticks
Scissors
Ruler
Pen
Headband
5/8″ wide Ribbon (I used about 5’ of blue grosgrain)
1” Multicolored Pom Poms (135-150 pieces)
Needle (optional)
Embroidery floss (optional)
Craft Foam Sheet (9″x12″)
Tinsel or Poly-fill
Felt sheets
Wood Craft Stick
Template
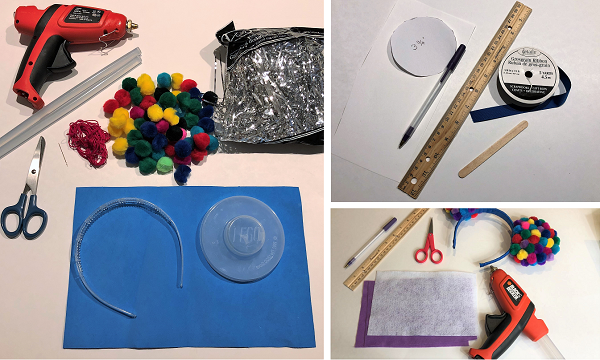
Click here to access the PDF template for the ears. It includes the inner and outer circle, and a template to arrange the pom poms.
Click the video to watch the full tutorial on YouTube or read below for step-by-step written instructions with photos.
How to Make the Ears
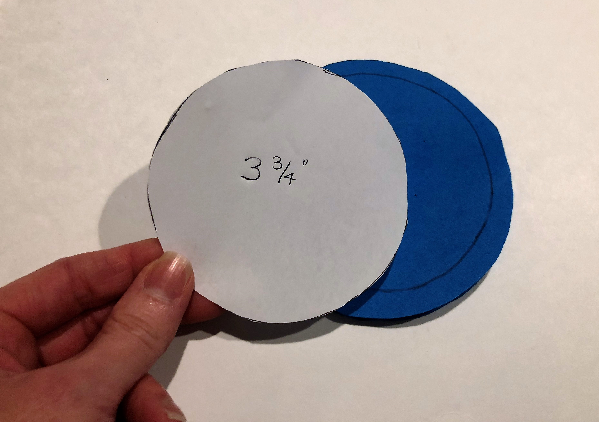
Trace or draw four, 4 ¼” circles on the craft foam sheet and cut out the circles. We used the lid from a Lego pick a brick container. You can use link in the supplies list to print the template I created.

Draw a 3 ¾” circle, or trace around the template in the center of your cut out circle, this is your line to sew on, or you can glue outside the line and press together without sewing.
Thread your needle with the floss and tie a knot in the end. Place two circles together with the sew line on the outside. Push the needle through both pieces of the foam, go over about ¼” and push the needle down through the foam to do a simple running stitch most of the way around the circle.
Leave about 1 ½” opening at the bottom but don’t cut the thread yet, you will finish sewing it closed after filling.
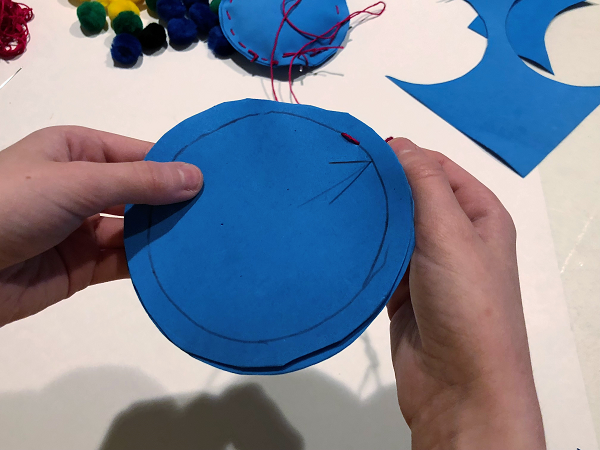
Trim a handful of tinsel or stuffing and stuff it inside the circle. Use your fingers or the wood craft stick to tuck the tinsel inside, filling the circle to make a nice pillow that is about 1” thick. You don’t need it too thick because the pom poms will make it look nice and full.
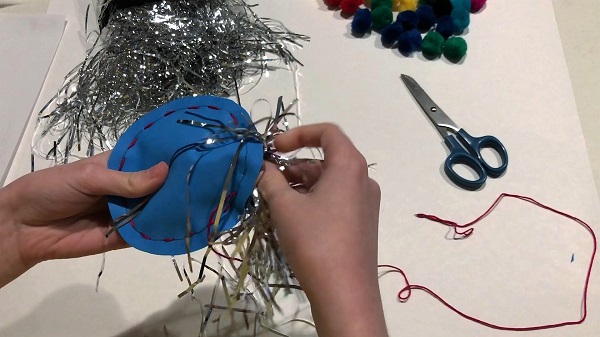
Finish sewing to complete the circle or glue closed. They don’t need to be perfect. Repeat to make the other ear.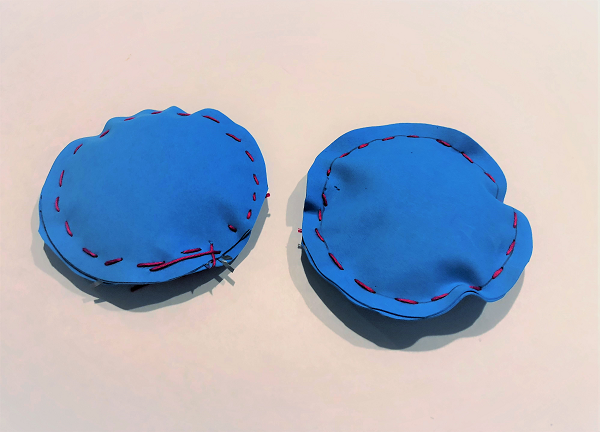
Wrap the headband with ribbon
Start with the ribbon on the outside, add a little glue and fold the tip of the ribbon inside, and begin wrapping the ribbon around the headband add a little hot glue to the headband and continue wrapping, pulling the ribbon snug as you wrap around the headband

How to Add the Ears to the Headband
Measure up 1” from the edge in the center of the circle.

Hot glue the edges together along bottom of the ear, if not glued already. Use the wood craft stick when pressing with hot glue so you don’t burn yourself. Put a line of hot glue halfway between the edge and the measured mark.
Fold the edge up to the mark and press, using the craft stick. Hold in place until the glue cools.
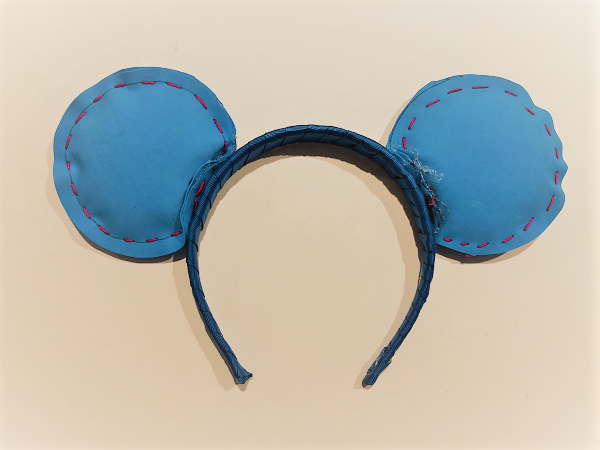
 Lay the headband and ears flat on your work surface. Run a line of hot glue along the flat part you made on the ears. Space the ears about 3 ¾” apart and press onto the headband.
Glue along the headband and ear on each side of both ears to reinforce them. This will help hold them in place and keep them upright.
Don’t worry about how this looks either, it will all be covered up with beautiful balloons.
If you would like to plan the placement in advance, sort the pom poms into color groups and divide each color group into four equal groups (so you can evenly disperse the colors). Trace an ear or print and use the template I made above, to lay out the pom poms. Place pom poms on the template so they are ready to be glued on.
Put down a line of glue and press the pom poms onto the ear. Place the pom poms right up to the headband so you can’t see the foam ear underneath. You want the pom poms to hang over the edge of the ear just a bit when you glue them on.
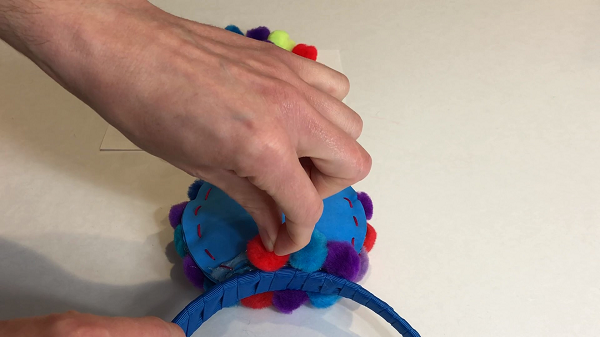
Twist the pom poms into the glue to get them to adhere well, adding extra glue if needed to get the pom poms to hold. Fluff the pom poms as needed, as you add them so they look nice and round. Make another line of glue and add more pom poms, offset the rows so they fit together without gaps, placing them close enough so they touch but still look round.

Continue adding glue and pom poms to the ear alternating colors so it looks like a bunch of balloons.

Now, finish the other three sides of the ears. Add a bit of glue between the pom poms and press them together to fill any gaps. If you have a large gap, add some glue and an additional pom pom.
Clean the glue gun tip as needed by wiping it with a paper towel, while it is hot, so you don’t get yucky stuff on your pom poms.
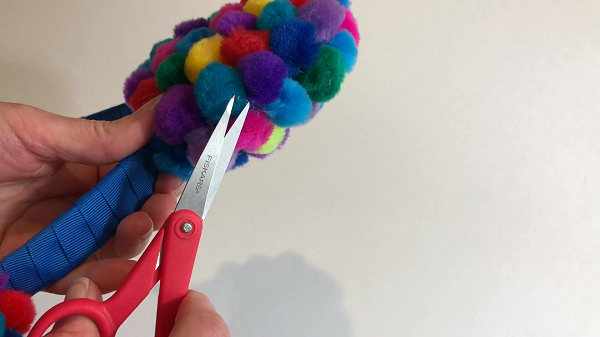
Trim any uneven pom poms and stray threads of hot glue. I got these Fiskars scissors recently from Amazon. They are amazing for crafting. I love the sharp tip for detailed cuts and trimming.
How to Make the Bow
You can use any color felt you would like, I chose purple and white felt for the bow because it reminds us of Grape Soda from the movie.
Cut the white piece of felt to 5 ½” x 4” piece to use for the bow center. Cut each piece of the purple felt to 5 ½” x 7 ½”
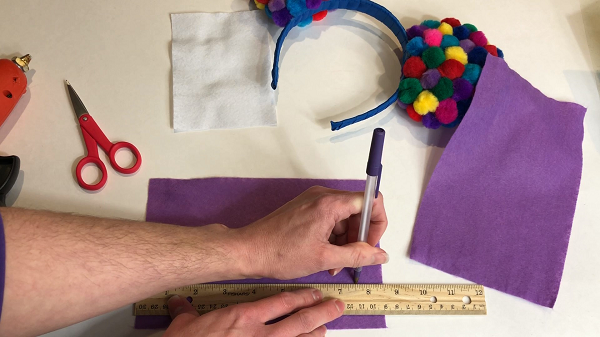
Working with one piece of purple felt, fold the long edge about ⅓-½ way up from the bottom. Dot hot glue about four places along the top of the folded edge.
Fold the top edge down to barely overlap the glue and gently press. Open up the tube to make sure it isn’t glued together. Set it aside and repeat with the second piece of purple felt.

Place the white felt horizontally. Glue from the center to the edge along top and bottom and along the edge. Fold it in half so the short edges meet, and press the edges together.
Glue along the folded edge and half way across the bottom and top. Fold so the cut edge side almost meets the other side but doesn’t overlap.
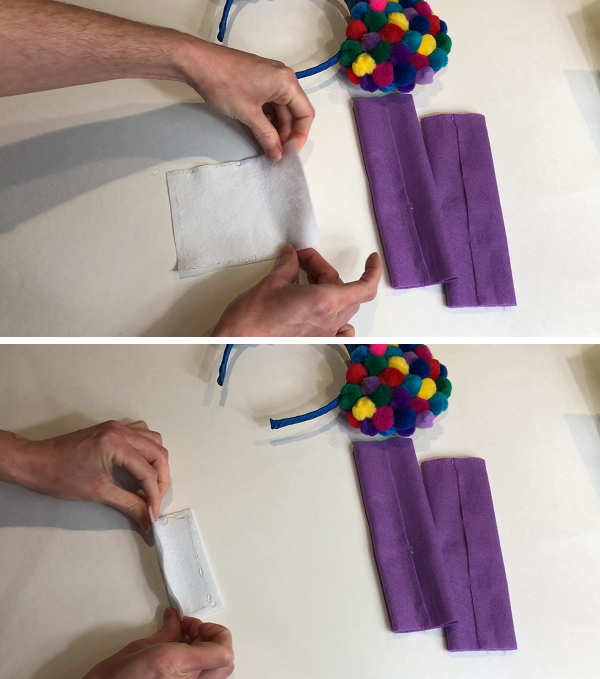
Glue along the ends of the purple tube and press closed. Glue along the sealed tube and fold in half with the seam on the inside, and press.

Fold the cut edge in half. Then fold one side in half, folding down, up, and then down.
Fold the other side the same.
Pinch together and glue in between the folds on the top and bottom.
Pinch and hold until it cools. Repeat for the other side of the bow.

Glue the center of the bow and press the two purple sides together.
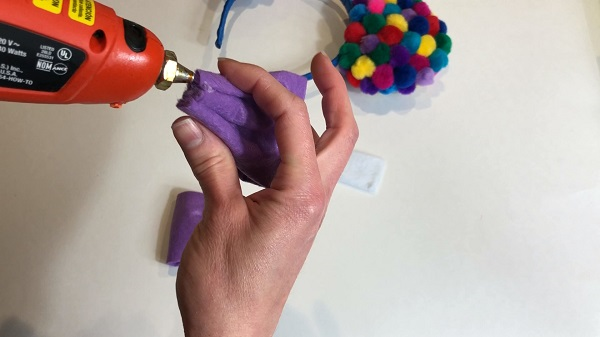
Back to the white piece of felt. With the seam side up, glue along the narrow, bottom edge and about an inch up the center. Place the glued edge at the bottom of the bow and press. Wrap the glued part up the back of the bow.
Glue the front of the bow, press down on the sides and wrap the center down over the front of the bow.
Glue under the bow and finish wrapping the center around the bow.
Test fit the bow on the headband to see where you will trim the end off. Trim off the excess ends of the white felt. Glue the open ends of felt together, this will make it more secure. Press the layers of felt together with the wood craft stick.
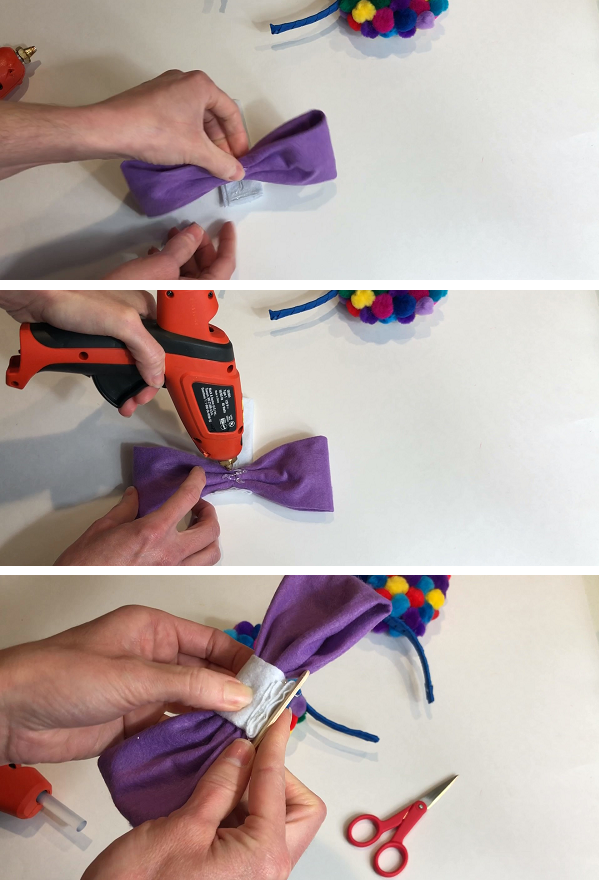
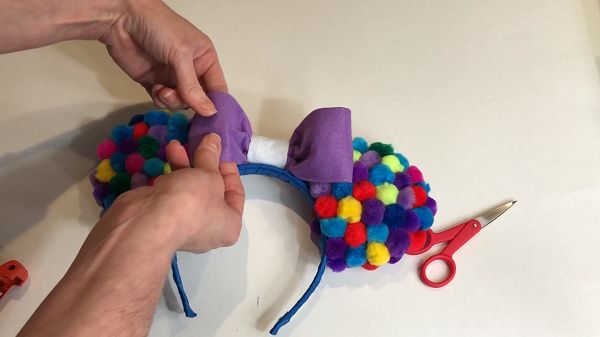
Choose final placement for the bow. Glue bottom of bow, place in the center of the headband with the seam facing back and press bow in place.

Shape and fluff the bow.
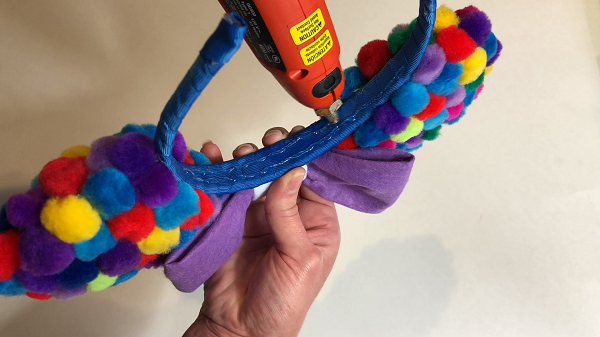
Add some lines of glue inside the headband to help give it grip and hold it in place when you wear it.
There they are. Balloon ears to carry you off to your next adventure.

I can’t wait to wear mine to Pixar Fest! I will post photos when I get back, follow me on social media for my latest photos.
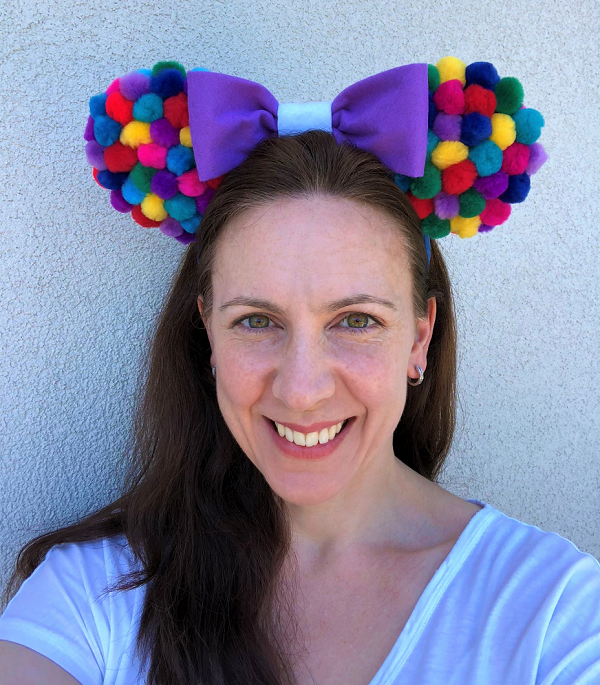
Thank you for checking out my Balloon Ears Tutorial. There are so many talented ear makers, with such unique creations. Have you made a pair of your own Mickey Ears? What theme are they? Tell me in the comments.
Best,
Megan
